
最近,知名的开源项目 Alist 发生了一系列风波,引发了社区对供应链安全的广泛担忧。这件事对我个人而言,不仅是一个安全警示,更是一个契机,让我重新审视了长期以来依赖自建服务的策略。
我使用 Alist,主要看重的是其强大的 WebDAV 服务和多用户权限功能,而不是他能挂一堆网盘上去,它让我在自己的服务器上轻松地搭建起了个人数据同步中心。但这次事件让我意识到,**自建服务除了要面对潜在的供应链风险(项目本身、作者提供的回调API等),**其稳定性也完全受限于我们自己的服务器和运维能力,强如DMIT,上个月也因为大楼的疑似火警,宕机了几个小时,我们购买的服务器,其SLA更是无法与专业的服务商相提并论。因此,我决定寻找一个由专业团队维护、提供原生WebDAV支持的云存储服务作为替代。
寻找替代方案:从自建到专业服务
我的选型标准很明确:可靠的专业服务、良好的隐私策略、以及原生的 WebDAV 支持。
- 坚果云 是一个优秀的选择,可惜但在免费套餐下,每月1GB的上传和3GB的下载流量,对于需要频繁同步的WebDAV场景来说,限制较大。
- 随后,我注意到了 Koofr。这是一家欧洲的服务商,以注重用户隐私而闻名。其免费套餐相当有诚意:
- 10 GB 存储空间
- 不限制单文件大小
- 支持 WebDAV
- 每日 50 GB 的公开分享带宽
- 可以挂载OneDrive和Google Drive
这些特性几乎完美满足了我所有的需求,尤其是原生WebDAV支持,免去了自行部署和维护的麻烦。
新的问题:网络延迟与访问速度
然而,在将我的 WebDAV 客户端指向 Koofr 后,一个新的问题出现了。由于其服务器位于欧洲,使用本地网络直接访问的连接质量非常不稳定,WebDAV 的传输速度长期维持在几十KB/s,这让文件同步几乎无法正常进行。
放弃如此契合的服务实在可惜,我需要一个更轻量、高效的解决方案。
解决方案:利用 Deno Playground搭建轻量级中继
此时,我想起了之前编写的一个部署在 Deno 上的反向代理脚本,这个脚本原先是为了代理那些连通性比较差的AI的API用的,能代理这些AI,也就能代理Koofr!
Deno 的 Playground 运行在谷歌云上,虽然是谷歌云但是使用本地网络访问起来速度很不错,它的免费额度(每月100万次请求,100GB出站流量)也非常充裕。
我的想法是,将这个脚本稍作修改,让他支持Koofr 的 WebDAV代理。所有本地到Koofr的请求,都先经过Deno Deploy的节点进行转发,从而绕开不佳的国际链路,实现加速效果。
核心代码如下
改造的核心是增加对 Koofr 域名的代理,并特殊处理 WebDAV 的 PROPFIND 方法。因为 WebDAV 客户端在列出目录时,响应的XML文件中包含了文件的URL路径。代理必须将这些路径从目标服务器的路径(如 /dav/Koofr/file.txt)重写为代理服务器的路径(如 /koofr/dav/Koofr/file.txt),客户端才能正确识别。
import { serve, type ServeHandlerInfo } from "https://deno.land/[email protected]/http/server.ts";

// 定义路径到目标URL的映射
// 键是代理服务器接收到的路径前缀,值是对应的目标服务器基础URL
const pathMappings: Record<string, string> = {
  '/anthropic': 'https://api.anthropic.com',
  '/gemini': 'https://generativelanguage.googleapis.com',
  '/openai': 'https://api.openai.com', // 目标是根路径
  '/openrouter': 'https://openrouter.ai/api', // 目标本身有路径 /api
  '/xai': 'https://api.x.ai',
  '/telegram': 'https://api.telegram.org',
  '/discord': 'https://discord.com/api',    // 目标本身有路径 /api
  '/groq': 'https://api.groq.com/openai',   // 目标本身有路径 /openai
  '/cohere': 'https://api.cohere.ai',
  '/huggingface': 'https://api-inference.huggingface.co',
  '/together': 'https://api.together.xyz',
  '/novita': 'https://api.novita.ai',
  '/portkey': 'https://api.portkey.ai',
  '/fireworks': 'https://api.fireworks.ai/inference', // 目标本身有路径 /inference
  '/koofr': 'https://app.koofr.net',
};

// 从环境变量 "PORT" 获取端口号,如果未设置则默认为 8000
const port = parseInt(Deno.env.get("PORT") || "8000");

console.log(`代理服务器正在启动,监听端口: http://localhost:${port}`);

// 启动HTTP服务器,为每个请求调用回调函数
serve(async (req: Request, _connInfo: ServeHandlerInfo) => {
  const incomingUrl = new URL(req.url); // 解析入站请求的URL
  const incomingPathname = incomingUrl.pathname; // 获取入站请求的路径部分

  // 创建包含安全相关头部的 Headers 对象
  const createSecureHeaders = (contentType?: string): Headers => {
    const headers = new Headers();
    if (contentType) {
      headers.set('Content-Type', contentType);
    }
    headers.set('X-Content-Type-Options', 'nosniff');
    headers.set('X-Frame-Options', 'DENY');
    headers.set('Referrer-Policy', 'no-referrer');
    return headers;
  };

  if (incomingPathname === '/' || incomingPathname === '/index.html') {
    return new Response(null, {
      status: 404,
      headers: createSecureHeaders()
    });
  }

  if (incomingPathname === '/robots.txt') {
    return new Response('User-agent: *\nDisallow: /', {
      status: 200,
      headers: createSecureHeaders('text/plain')
    });
  }

  let targetBaseUrlString: string | undefined;
  let matchedPrefix: string | undefined;

  for (const prefix in pathMappings) {
    if (incomingPathname.startsWith(prefix)) {
      targetBaseUrlString = pathMappings[prefix];
      matchedPrefix = prefix;
      break;
    }
  }

  if (!targetBaseUrlString || !matchedPrefix) {
    console.warn(`[${new Date().toISOString()}] 未找到路径映射: ${incomingPathname}`);
    return new Response("未找到: 此路径没有代理映射。", {
      status: 404,
      headers: createSecureHeaders('text/plain')
    });
  }

  const parsedTargetBaseUrl = new URL(targetBaseUrlString);
  // suffixPath 是入站请求路径中,匹配掉代理前缀后的剩余部分。
  // 例如:incomingPathname = "/openrouter/v1/chat", matchedPrefix = "/openrouter" -> suffixPath = "/v1/chat"
  // 例如:incomingPathname = "/openai/foo", matchedPrefix = "/openai" -> suffixPath = "/foo"
  // 例如:incomingPathname = "/openrouter", matchedPrefix = "/openrouter" -> suffixPath = ""
  const suffixPath = incomingPathname.substring(matchedPrefix.length);

  // --- 路径拼接逻辑 ---
  // 1. 规范化基础URL (`baseForNewUrl`)
  //    目标是确保如果 parsedTargetBaseUrl 本身有路径 (其 pathname 不是根路径"/"),
  //    那么 baseForNewUrl 的字符串表示应该以 "/" 结尾,以便 new URL() 正确地追加相对路径。
  let baseForNewUrl = parsedTargetBaseUrl.href; // 初始为映射中定义的URL的href字符串
                                               // e.g., "https://api.openai.com/" or "https://openrouter.ai/api"

  // 检查 parsedTargetBaseUrl.pathname:
  // - "https://api.openai.com" -> pathname is "/"
  // - "https://openrouter.ai/api" -> pathname is "/api"
  // - "https://openrouter.ai/api/" -> pathname is "/api/"
  if (parsedTargetBaseUrl.pathname !== '/' && !baseForNewUrl.endsWith('/')) {
    // 如果目标URL的路径不是根目录,并且其href不以'/'结尾 (例如 "https://host.com/path")
    // 则在其末尾添加'/',使其变为 "https://host.com/path/"
    baseForNewUrl += '/';
  }
  // 现在 baseForNewUrl 对于有路径的基础URL,其路径部分会以'/'结尾 (如 "https://host.com/path/")
  // 对于根路径的基础URL,它可能是 "https://host.com/" 或 "https://host.com" (URL构造函数都能正确处理)

  // 2. 规范化要追加的路径 (`pathForNewUrl`)
  //    目标是确保从 suffixPath 得到的路径是一个相对路径(不以 "/" 开头)。
  let pathForNewUrl = suffixPath;
  // - suffixPath = "/v1/chat" -> pathForNewUrl = "v1/chat"
  // - suffixPath = "v1/chat"  -> pathForNewUrl = "v1/chat" (不变)
  // - suffixPath = ""        -> pathForNewUrl = "" (不变)
  if (pathForNewUrl.startsWith('/')) {
    pathForNewUrl = pathForNewUrl.substring(1);
  }

  // 3. 构建最终的目标URL
  //    使用规范化的 baseForNewUrl 和 pathForNewUrl。
  //    例如:
  //    - req: /openai/v1/chat -> target: https://api.openai.com, suffix: /v1/chat
  //      base: "https://api.openai.com/" (或 "https://api.openai.com"), path: "v1/chat"
  //      -> new URL("v1/chat", "https://api.openai.com/") -> https://api.openai.com/v1/chat
  //    - req: /openrouter/v1/chat -> target: https://openrouter.ai/api, suffix: /v1/chat
  //      base: "https://openrouter.ai/api/", path: "v1/chat"
  //      -> new URL("v1/chat", "https://openrouter.ai/api/") -> https://openrouter.ai/api/v1/chat (正确!)
  //    - req: /openrouter -> target: https://openrouter.ai/api, suffix: ""
  //      base: "https://openrouter.ai/api/", path: ""
  //      -> new URL("", "https://openrouter.ai/api/") -> https://openrouter.ai/api/
  const finalTargetUrl = new URL(pathForNewUrl + incomingUrl.search, baseForNewUrl);
  // --- 路径拼接逻辑结束 ---

  const headersToProxy = new Headers(req.headers);
  headersToProxy.set("Host", finalTargetUrl.host); // 使用最终目标URL的主机名

  // 删除不应被代理的 "hop-by-hop" 头部
  headersToProxy.delete("X-Forwarded-For");
  headersToProxy.delete("X-Real-IP");
  headersToProxy.delete("Forwarded");
  headersToProxy.delete("Via");

  const proxyReq = new Request(finalTargetUrl.toString(), {
    method: req.method,
    headers: headersToProxy,
    body: req.body,
    redirect: "manual", // 代理服务器不应自动处理重定向
  });

  try {
    const proxyRes = await fetch(proxyReq);

    // --- WebDAV 路径重写逻辑 ---
    // 检查是否为需要重写响应体的特定请求。
    // 针对 Koofr WebDAV 的场景:当请求方法为 PROPFIND (WebDAV用于列出目录内容的方法)
    // 且请求路径前缀为 /koofr 时,我们需要修改响应内容。
    if (matchedPrefix === '/koofr' && req.method === 'PROPFIND') {
      const contentType = proxyRes.headers.get('Content-Type') || '';
      // 确保我们只修改XML响应,这是WebDAV列表的格式。
      if (proxyRes.ok && (contentType.includes('application/xml') || contentType.includes('text/xml'))) {
        const originalBodyText = await proxyRes.text();

        // `suffixPath` 是目标服务器上的路径, 例如 "/dav/Koofr/webdav"
        // `incomingPathname` 是客户端请求代理服务器的完整路径, 例如 "/koofr/dav/Koofr/webdav"
        // 目标服务器返回的XML内容中包含了大量的 `suffixPath`。
        // 我们需要将它们全部替换为 `incomingPathname`,以便客户端能构建正确的URL。
        // 例如,将 XML 中的 href="/dav/Koofr/webdav/file.zip" 替换为 href="/koofr/dav/Koofr/webdav/file.zip"。

        // 使用 String.prototype.replaceAll() 进行全局替换。
        // 增加一个安全检查,避免 `suffixPath` 为 "/" 时替换掉所有根路径。
        if (suffixPath && suffixPath.length > 1) {
          const rewrittenBody = originalBodyText.replaceAll(suffixPath, incomingPathname);

          const responseHeaders = new Headers(proxyRes.headers);
          // 因为我们修改了响应体,原有的 'Content-Length' 头不再准确,
          // 需要删除它,以便Deno/HTTP服务器自动重新计算。
          responseHeaders.delete('Content-Length');

          // 为代理响应添加/确保我们自己的安全头部
          responseHeaders.set('X-Content-Type-Options', 'nosniff');
          responseHeaders.set('X-Frame-Options', 'DENY');
          responseHeaders.set('Referrer-Policy', 'no-referrer');

          // 返回修改后的响应
          return new Response(rewrittenBody, {
            status: proxyRes.status,
            statusText: proxyRes.statusText,
            headers: responseHeaders,
          });
        }
      }
    }
    // --- WebDAV 路径重写逻辑结束 ---

    // 对于所有其他请求,或者不满足上述重写条件的请求,执行原始的透传逻辑。
    const responseHeaders = new Headers(proxyRes.headers);

    // 从目标服务器的响应中删除 hop-by-hop 头部
    responseHeaders.delete("Transfer-Encoding");
    responseHeaders.delete("Connection");
    responseHeaders.delete("Keep-Alive");
    responseHeaders.delete("Proxy-Authenticate");
    responseHeaders.delete("Proxy-Authorization");
    responseHeaders.delete("TE");
    responseHeaders.delete("Trailers");
    responseHeaders.delete("Upgrade");

    // 为代理响应添加/确保我们自己的安全头部
    responseHeaders.set('X-Content-Type-Options', 'nosniff');
    responseHeaders.set('X-Frame-Options', 'DENY');
    responseHeaders.set('Referrer-Policy', 'no-referrer');

    return new Response(proxyRes.body, {
      status: proxyRes.status,
      statusText: proxyRes.statusText,
      headers: responseHeaders,
    });

  } catch (error) {
    console.error(`[${new Date().toISOString()}] 请求目标URL时出错 ${finalTargetUrl.toString()}:`, error);
    return new Response("网关错误: 连接上游服务器时出错。", {
      status: 502,
      headers: createSecureHeaders('text/plain')
    });
  }

}, { port });
部署步骤
部署过程非常简单,且完全免费:
- 访问
https://dash.deno.com并使用 GitHub 账号登录。 - 点击 New Playground,将完整的代理代码粘贴进去。
- 点击 Save & Deploy。部署完成后,Deno会提供一个格式为
https://[project-name].deno.dev的公开域名。
如何使用
假设你获得的域名是 https://my-proxy.deno.dev。
现在,在你使用的任何WebDAV客户端中,将服务器地址从:
https://app.koofr.net 替换为 https://my-proxy.deno.dev/koofr
例如,完整的WebDAV访问URL将从 https://app.koofr.net/dav/Koofr 变为 https://my-proxy.deno.dev/koofr/dav/Koofr。
配置完成后,Koofr的WebDAV访问速度得到了质的提升,文件同步恢复了应有的流畅。
总结
最终,这个 “Koofr + Deno” 的组合方案,让我以零成本的方式,获得了一个兼具高可靠性、隐私保护和高速访问的个人WebDAV服务。
Deno肯定会积极维护自己的Playground,谷歌云的SLA也很不错,即使这两个挂了,我们还是可以使用Koofr自己本身的链接进行不那么高速的同步,只有Koofr自己挂了才可能无法同步,健壮性应该是比自建Alist作为webdav方案要强很多
P.S.
这个代码其实本身是用来代理各种AI的API用的,也就说,你可以通过这个中继,来更丝滑的使用AI的API,而不用担心网络/地区问题。
代理地址中的 [project-name] 是一个占位符,您需要将其替换为您的实际 Deno Deploy 项目名称。
| 代理地址 | 等同于 |
|---|---|
https://[project-name].deno.dev/anthropic | https://api.anthropic.com |
https://[project-name].deno.dev/gemini | https://generativelanguage.googleapis.com |
https://[project-name].deno.dev/openai | https://api.openai.com |
https://[project-name].deno.dev/openrouter | https://openrouter.ai/api |
https://[project-name].deno.dev/xai | https://api.x.ai |
https://[project-name].deno.dev/telegram | https://api.telegram.org |
https://[project-name].deno.dev/discord | https://discord.com/api |
https://[project-name].deno.dev/groq | https://api.groq.com/openai |
https://[project-name].deno.dev/cohere | https://api.cohere.ai |
https://[project-name].deno.dev/huggingface | https://api-inference.huggingface.co |
https://[project-name].deno.dev/together | https://api.together.xyz |
https://[project-name].deno.dev/novita | https://api.novita.ai |
https://[project-name].deno.dev/portkey | https://api.portkey.ai |
https://[project-name].deno.dev/fireworks | https://api.fireworks.ai/inference |
https://[project-name].deno.dev/koofr | https://app.koofr.net |
你问为什么选择Deno Playground而不是Cloudflare Worker?
因为Worker反代会传透请求的请求头,如果你没有主动过滤,那你的真实IP、浏览器的语言、浏览器的UA、浏览器的版本和型号都会被传给被反代的网站。
即使你使用自构造的或者主动过滤了相关的请求头,尽管你的真实IP不会泄漏,但是你的Workers域名和真实IP所属国家仍然会被传透过去。
不论你怎样修改代码,你会发现cf-ipcountry和cf-worker是无论如何都去不掉的,这就是反代github等网站被Netcraft轻易发现并被举报的根本原因。
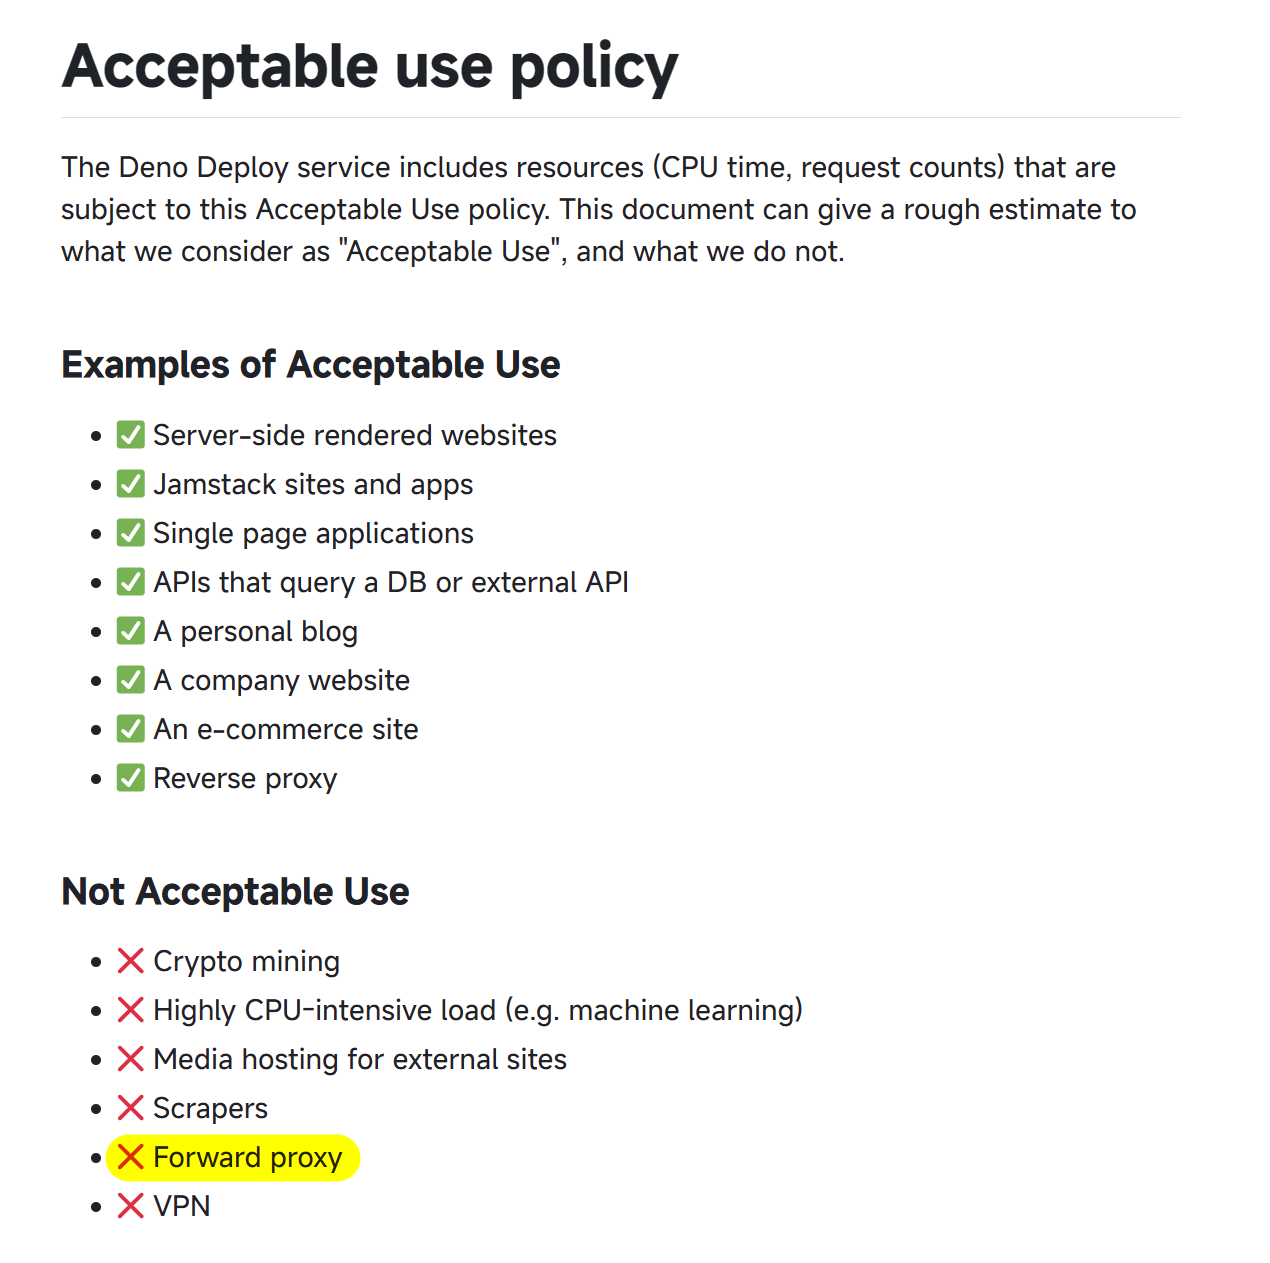
但是,Deno的Acceptable use policy中明确表示了,不应该使用他作为正向代理使用,本方法的核心就是那一段Deno代码,去薅个 supabse / fastly 然后用它的 serverless function ,似乎是一个阉割版本 Deno,也是一种选择
放在自己的服务器上也可以,虽然需要自己维护服务器,但这段代码至少不会涉及到商业利益了(笑)